Showing posts with label thrift. Show all posts

Wednesday, August 29, 2012

Seat Obsession.


While searching for some living room inspiration online during my recent move downtown, I've fallen in love with high backed furniture.  It's probably because mid-century furniture might be my favorite style at the moment but I wanted to share some of my inspiration and furniture finds in case you are in the market for a living room statement piece or just browsing like myself since there is no more space in my little Soho apartment.Tear. If there was however, you can bet my budget loving dollar that I would snatch up one of the vintage pieces I posted below from Etsy...They are so unique and afordable. So get your shop on and make me proud by giving one of these stylish seats some love!


.....INSPIRATION.....

.....ETSY FINDS.....


.....MORE FINDS.....


Wednesday, August 01, 2012

DIY: Street Find Chair Redo.

Walking home in my neighborhood from CVS a few nights ago, I stumbled upon this poor little chair that someone left behind from their move. It clearly was not appealing to anyone in the shape I found it in but remembering what Lara Spencer said about "looking for good bones in furniture" in her book "I Brake for Yard Sales," I couldn't leave this find behind. Even though the chairs wooden frame wasn't in the best shape or quality, its art deco design won my heart over. After hauling this beauty two blocks and four flights of stairs later, my transformation began. With a coat of white paint and a quick recover job, I am proud to say I gave this once city dump destined chair a whole new look and home... Now thats what I call charity! :)  
Read my easy how-to below...

WHAT YOU'LL NEED:
-Paint (I used a paint that was similar to the one here. Semi-gloss in white.)
-Paint Brushes (I used one similar to the brushes here. They are perfect for apply a thick coat of paint so you only have to do one coat. They also give you smooth finished look.)
-Fabric (Bought from a fabric store on 39th street for $5.00 a yard.)
-Staple Gun and Staples

EASY HOW TO:
1) Remove cushion and paint wooden frame.
(No need to prime with this thick paint. Paint until frame is covered with a smooth finish.)

2) While you are allowing your paint to dry and your cushion is disassembled from your chair frame, take this time to recover it in your favorite fabric.  Cut enough fabric to wrap around the entire cushion. (I also used a white fabric as my first layer to hide what could be seen through the stripe fabric... It was a little too thin and sheer for this project but it worked out.)

3) Tightly wrap fabric around cushion and staple with staple gun.
(Be sure that fabric is straight before you staple so the stripes are centered if your using a stripe or plaid printed fabric.)

4) Screw seat cushion back into the frame once the paint has had time to dry over night....
The Finished Product!

Wednesday, July 25, 2012

DIY: Dining Chair Recover.

New Apartment Goal Number One: Find a set of vintage dining chairs to put around our kitchen table that needed a little fixing up so I could put my own spin on them to match our living room. While my mom was in the city visiting, I stumbled upon the perfect chairs only one street over from my apartment. Not only was the price right at $90 for both of them together but they were almost exactly what I invisioned for our space.
When I purchased the chairs I was planning on painting their wooded frame white or black and then recovering the seat but when I got them home I loved the way the natural wood finish looked in our apartment. So really all these chairs needed was a good recovering job and a pretty fabric.. (easy enough right?!)  I figured since I didn't paint them I could choose a more bold and risky fabric... So thats exactly what I did. I used a hot pink velvet fabric to cover the yuck greenish brown print that aged these pretty chairs.

I purchased the fabric down the street from the CK offices after work
one day at "Best Price Fabrics." I just randomly stumbled upon this
store and now I'm obsessed. I've already been back three times to buy more fabric for other projects. There prices are as amazing as the
selection. Most cotton fabrics are $5 a yard and then they go up to
around $15 for a silk. Below Is a picture of some of the fabrics I
bought (all of which were only $5 each.) They are located on 39th
street in between (7th and 8th ave) so you should def go check them out if you are in the area and love shopping for fabric as much as I do.

And I must say, I am very pleased my finished product... It has just enough modern and funky style from the fabric but still gives off a traditional feel thanks to its aged wood finish and shape. Images demonstrating my seat recovering process below...

What You'll Need:
-1 yd of Fabric for each chair cushion (depending on cushion size)
-Hot glue gun
-Staple gun
-Scissors
Cut fabric around chair arms before gluing down the fabric using a hot glue gun.

Finished Product:

Sunday, May 27, 2012

Weekend Snapshots.

The JCrew Liquor Store (Read about it here)

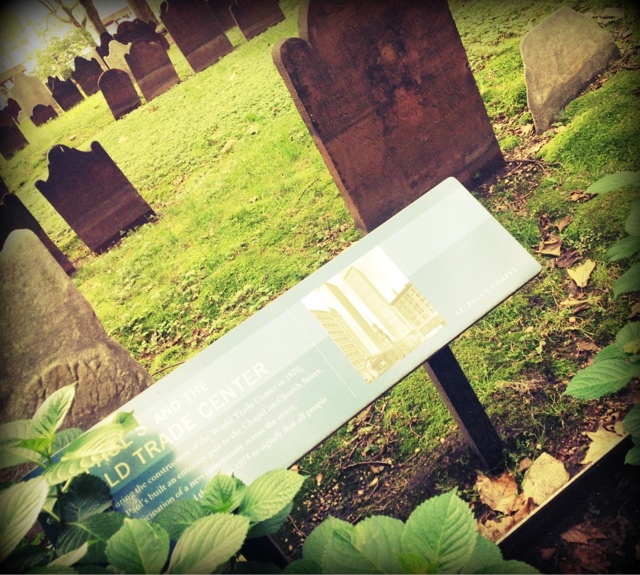
St Paul's Chapel Near Ground Zero (Read about it here)

Our walk across the Brooklyn Bridge Saturday

Lucite Coasters found at City Opera Thrift Store - $2 Each
(Not only was I so excited to find these coasters with my obsession with Lucite right now, but I about freaked out when I looked closer and realized they were monogramed with my initials "CC". What are the chances of that?!? I'm obsessed obviously.) 

Champagne Glasses found at City Opera Thrift Store - $2 Each

Tuesday, May 08, 2012

DIY: Chair Inspiration.

When we first moved into our apartment a year ago in the UES we had hardly
any furniture. I didn't spend much time hunting for the perfect set of
chairs for our living room but the ones I found I couldn't pass up
because they were only $25 each! Not to mention, I found them at
Housing Works in my neighborhood so they were an easy lugg just a few
blocks. They def could use a good paint job and a reupholster job but
I still think they have potential.
With my upcoming move on my mind, I've been constantly thinking about
all the little projects I need to finish before the big day... And
redoing these chairs is first on my list. I've already been
brainstorming what style I want to go for but it's so hard to make a
decision when I'm not sure how the room is going to be decorated. So
below I put together a few inspiration boards to collect my ideas. So
far my direction is a classic fabric (gingham, plaid, check or stripe)
with either a white, black or natural finish. I figure however my roomie and I
decide to decorate the living room, classic styled furniture would fit
right in. Before and after pictures to come!


PAINT IDEAS:


FABRIC IDEAS:


Please leave comments... I would love to hear your feedback!

Monday, May 07, 2012

Book of the Week.

By: Lara Spencer (Of My Favortire Morning Show: Good Morning America)

Yesterday on my way to the MET in the UES I passed by Jonathan Adler  and of course had to stop in... While browsing all of his colorful wacky decor, I noticed they had Lara Spencers new coffee table book for sale. Little did I know, Lara is a huge Jonathan Adler fan and a friend of the geometric genius.  Ive been wanting to get this book since the day they announced its release on GMA. To my surprise, its actually amazing and helpful with tips and tricks for the thrifty creative mind like myself. I had no idea Lara was so talented and even into interior design-- I love watching her on GMA every morning; I think she is such a doll. How could you not love this girl?!? She thrifty, stylish, sucessful, down to earth, and so cute! I'm a huge fan... You go Lara! Anyways here is a little back ground on her book and a few pictures. You should pick up a copy, I read the whole book yesterday on the MET steps and didn't even walk in the museum--- thats how good it is! Enjoy!

ABOUT...
Lara Spencer fesses up about shopping on the cheap and filling friends' homes with her fabulous finds in her new coffee table book "I Brake for Yard Sales: and Flea Markets, Thrift Shops, Auctions, and the Occasional Dumpster." Its spin-off HGTV series airs 8 p.m. Fridays. The book offers tips on scoring deals and refurbishing flea market finds.
Though most of you know me from seeing me on the red carpet with celebs and as a GMA anchor, hunting for wonderful secondhand finds has been a passion since I was a small girl. My mom used to take me "sale-ing" every weekend. That spelling is intentional, since yard "sale-ing" was exciting, adventurous, and, best of all, didn't require a boat-just a car with enough space to haul our finds home. In fact, my book's title comes from the bumper sticker on my mom's station wagon: "I Brake for Yard Sales" (and boy did she!). My mom has always been known to do an illegal U-turn if she spotted a good sale, and she was instrumental in teaching me to get high style for low prices by using the three R's - Rescue, Recycle, and Reinvent.


Friday, April 20, 2012

DIY: Faux Bamboo Chair.

For the past few months everything bamboo has been haunting me lately due to my current obsession with finding a faux bamboo chair to redo for my room. This is why I have so many inspiration pics below. Apparently I'm not the only one who is loving this bamboo trend for your home.

Anyways after numerous trips to local thrift stores and a weekly search on eBay and etsy, I finally found my prize last Sunday at Angel Street Thrift Store in Chelsea for the lovely price of $30! Which makes it all worth my hard work hunting. A can of gold spray paint ($7), a yard of fabric from mood ($25), a bag of sponges from home depot ($10) and a hot glue gun...I transformed this dingy thrift store find into a chic statement piece for my room. Easy how-to below...

Have a thrifty Thursday!


Since spray painting your chair is a no brainer... (It literally took me a total of 30 minutes to do 2 coats of paint)... Instead I explained how to make a homemade seat cushion since I was not a fan of the before wicker base. Plus I had to use fabric, It completes the look and gives it style.


HOW TO MAKE A HOME-MADE SEAT CUSHION:
1) Trim and arrange the sponges so that they cover the entire chair. Glue down with hot glue.

2) Cover with your old towel so that the surface is smooth and even before adding the fabric. 
Glue underneath the seat.

3) Measure out fabric over seat and begin to glue down underneath the wicker seat. Don't trim to fit the corners before hand, instead cut as you wrap around the seat. 
Simple as that!

MY INSPIRATION:


PERFECTION!!!